Register a public REST API as a data connection
What you will learn
Register a public weather API as a managed REST connector, then confirm what it actually returns with the connection test and the Query Console.
A Data Connection stores reusable settings for reaching an external system. Once its address and authentication method are registered, code and pipelines use the connector without repeating those settings.
In this lesson you register a public weather API as a data connection. Then you confirm two different things about it: whether it is reachable, with the connection test, and what it actually returns, with the Query Console.
The API you'll connect
Open-Meteo returns hourly weather values as JSON for a given coordinate. It needs no signup and no API key, which makes it a clean subject for a first REST connection.
| Item | Value |
|---|---|
| Base address | https://api.open-meteo.com |
| Path you'll call | /v1/forecast |
| Authentication | None |
Prerequisites
- One collection to register the connector in. Every asset in this path lands there.
- An environment where the manager can reach the public internet.
Only admins and managers can register connectors. If the create button is missing or the screen is read-only, ask an administrator to register the connection and continue from the Query Console section.
Step 1 — Start from Data Connection
- Select Data Connection in the left sidebar.
- Select the create button in the upper-right of the list.
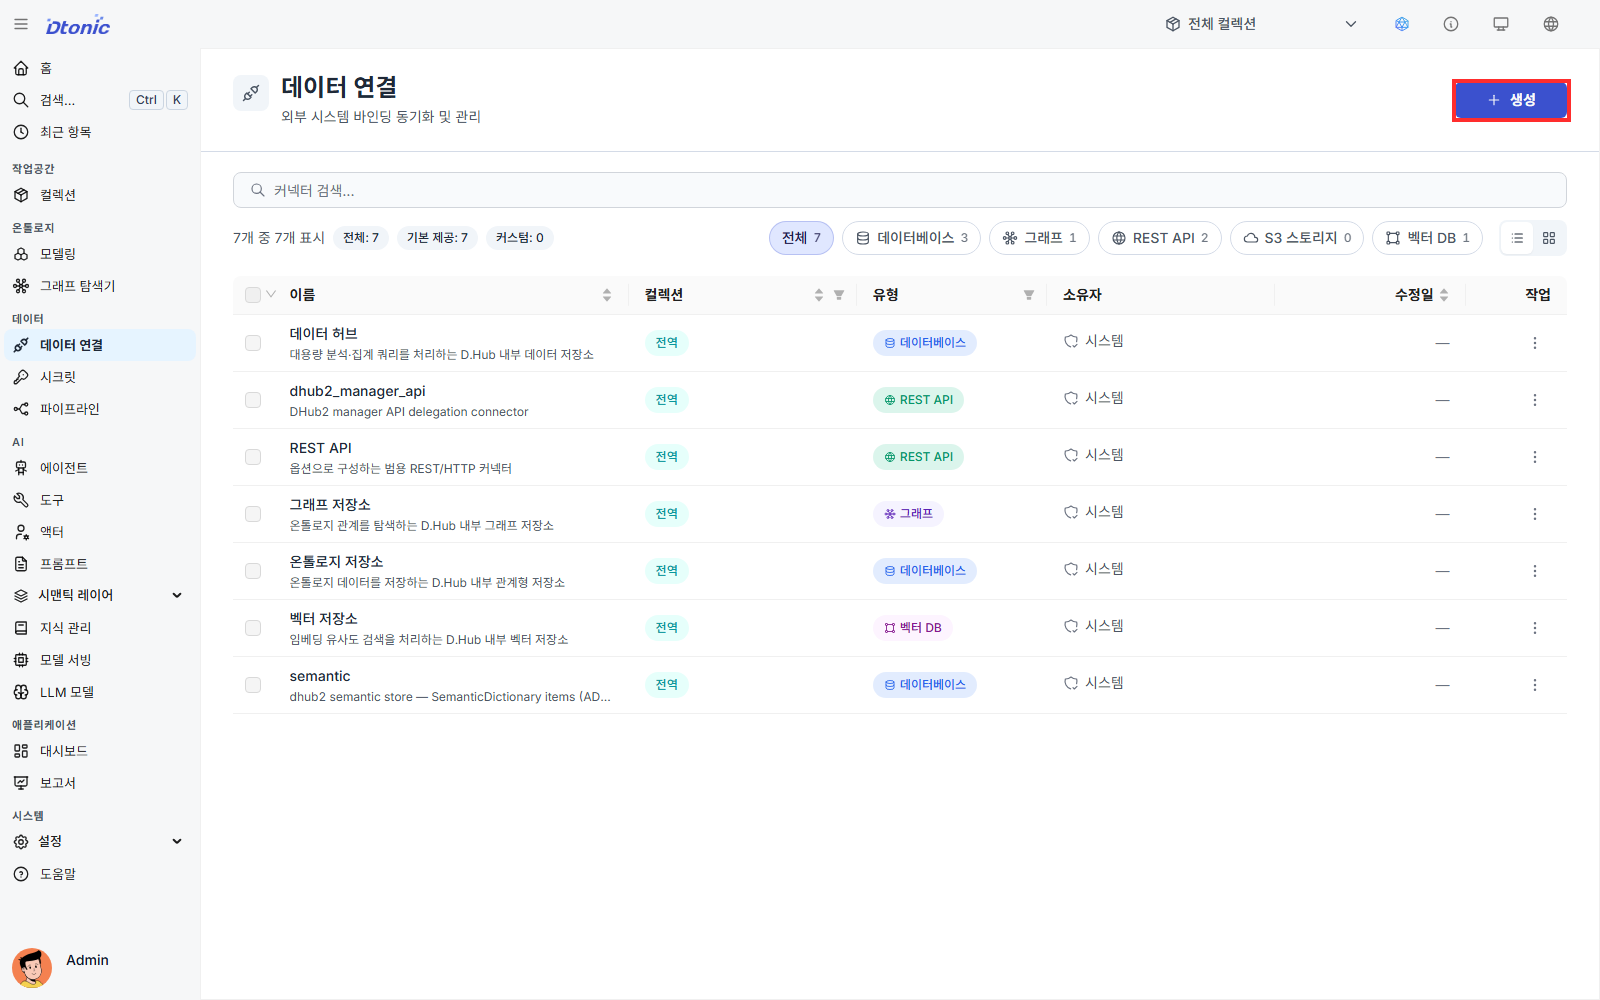
The form proceeds through connection method → technology → basic info and connection settings.
Step 2 — Choose a connection method and technology
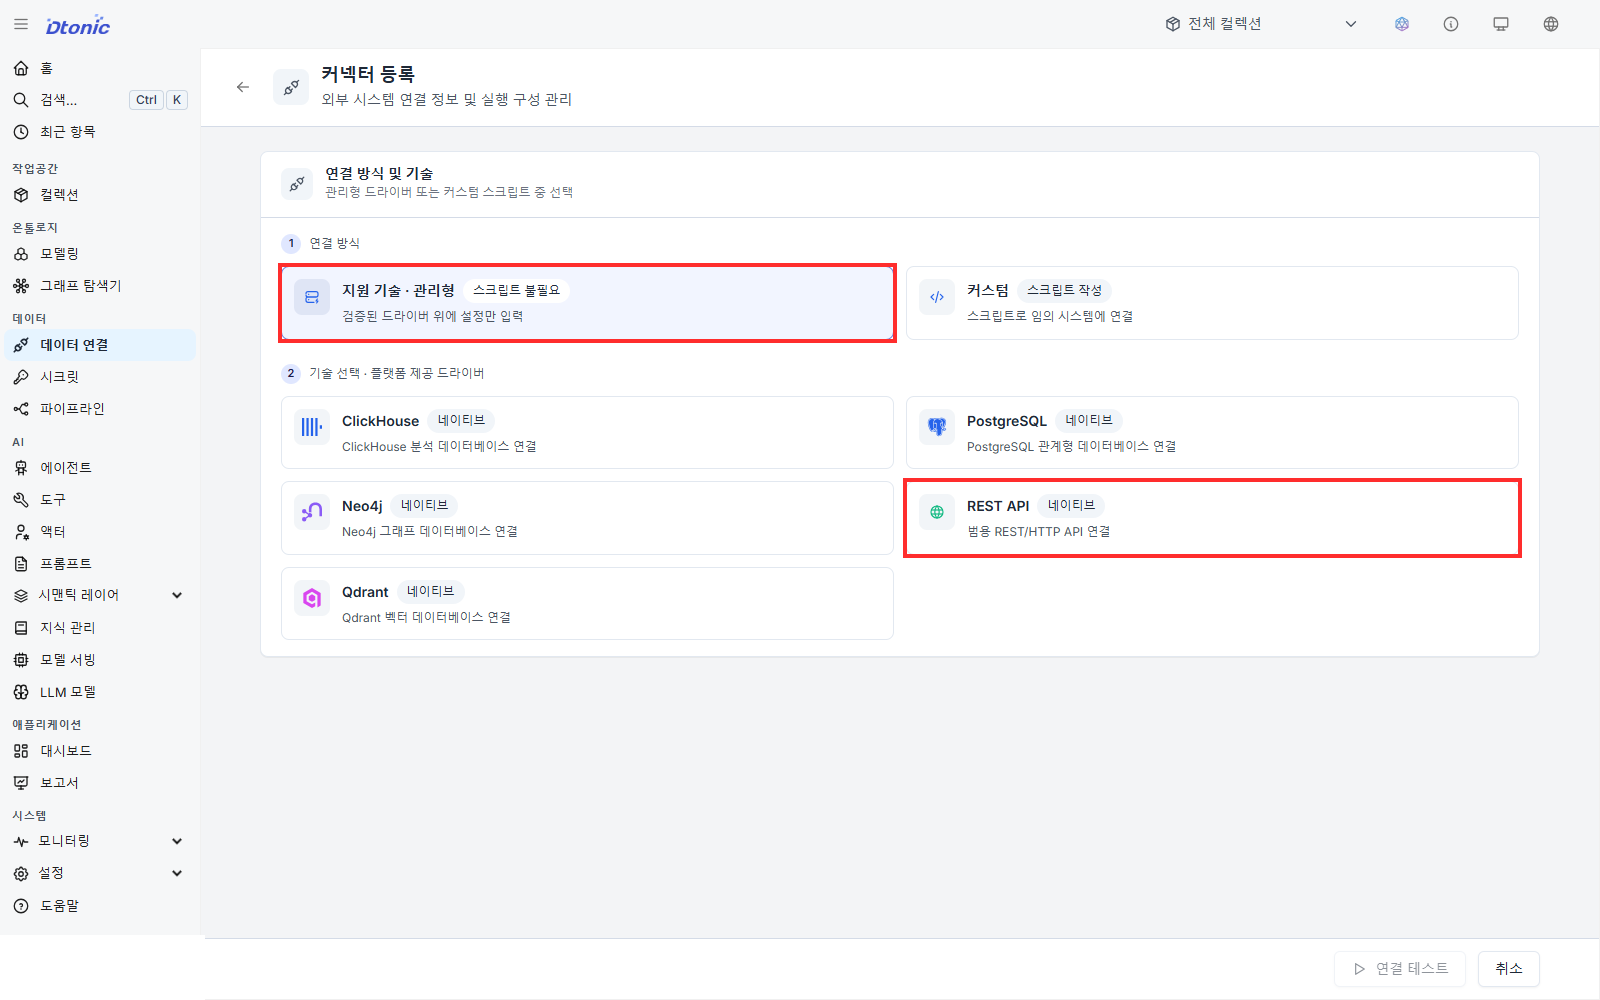
First, choose one Connection Method:
- Supported Tech · Managed — Uses a platform-verified native driver. You enter settings only; no script.
- Custom — Choose a type and write the
connectandgetfunctions yourself. Use it when the managed driver cannot express the API's authentication or response format.
Choose Supported Tech · Managed, then select the REST API card in the technology list.
Step 3 — Enter identity and connection settings
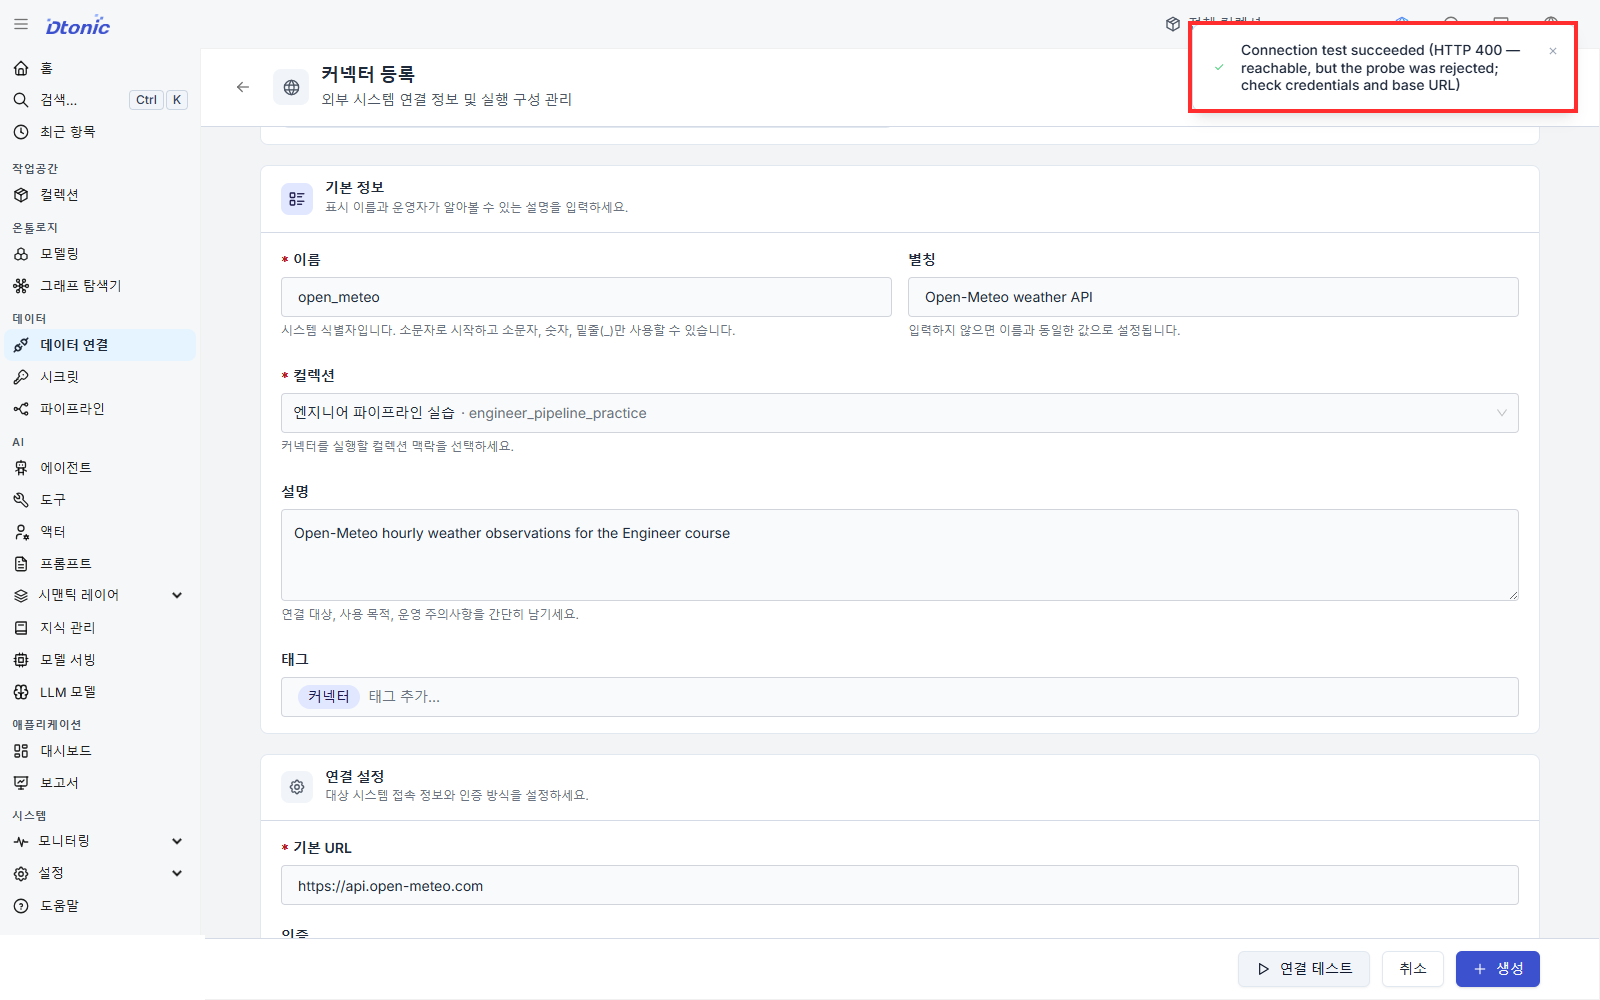
Selecting a technology opens the Basic information and Connection settings sections.
- Enter
open_meteounder Name. It must start with a lowercase letter and contain only lowercase letters, numbers, and underscores. - Enter a readable Alias, such as
Public weather API. - Under Collection, select this path's training collection.
- Describe the target and purpose, for example
Hourly temperature and humidity from Open-Meteo. - Fill in Connection settings:
| Field | Value |
|---|---|
| Base URL | https://api.open-meteo.com |
| Authentication | None |
| Timeout | 30 (default) |
| Verify SSL | On (default) |
Name is not a display string. In the next lesson your code references this connector as ref="open_meteo", so the name you choose here is a code identifier.
Test the connection and create it
- Select Test Connection at the bottom of the form.
- Confirm
Connection test succeeded. The Open-Meteo root returns HTTP 400 without required query parameters, soreachable, but the probe was rejectedcan appear even though the reachability test succeeded. - Once the test succeeds, select the create button.
The connection test only confirms that this configuration can reach the target right now. It does not guarantee later availability or access to a particular path. Leaving the screen after only testing does not save the connector — finish with create.
Read the real response in the Query Console
Registering a connector does not produce a dataset. It does, however, let you see what the connection returns, right now, from the connector's detail screen.
- Open the
open_meteoconnector from the Data Connection list. - Select the Query Console tab.
- Set the method to GET and the path to
/v1/forecast. - Add six query parameters:
| Name | Value |
|---|---|
latitude | 37.5665 |
longitude | 126.9780 |
hourly | temperature_2m,relative_humidity_2m |
past_days | 3 |
forecast_days | 0 |
timezone | Asia/Seoul |
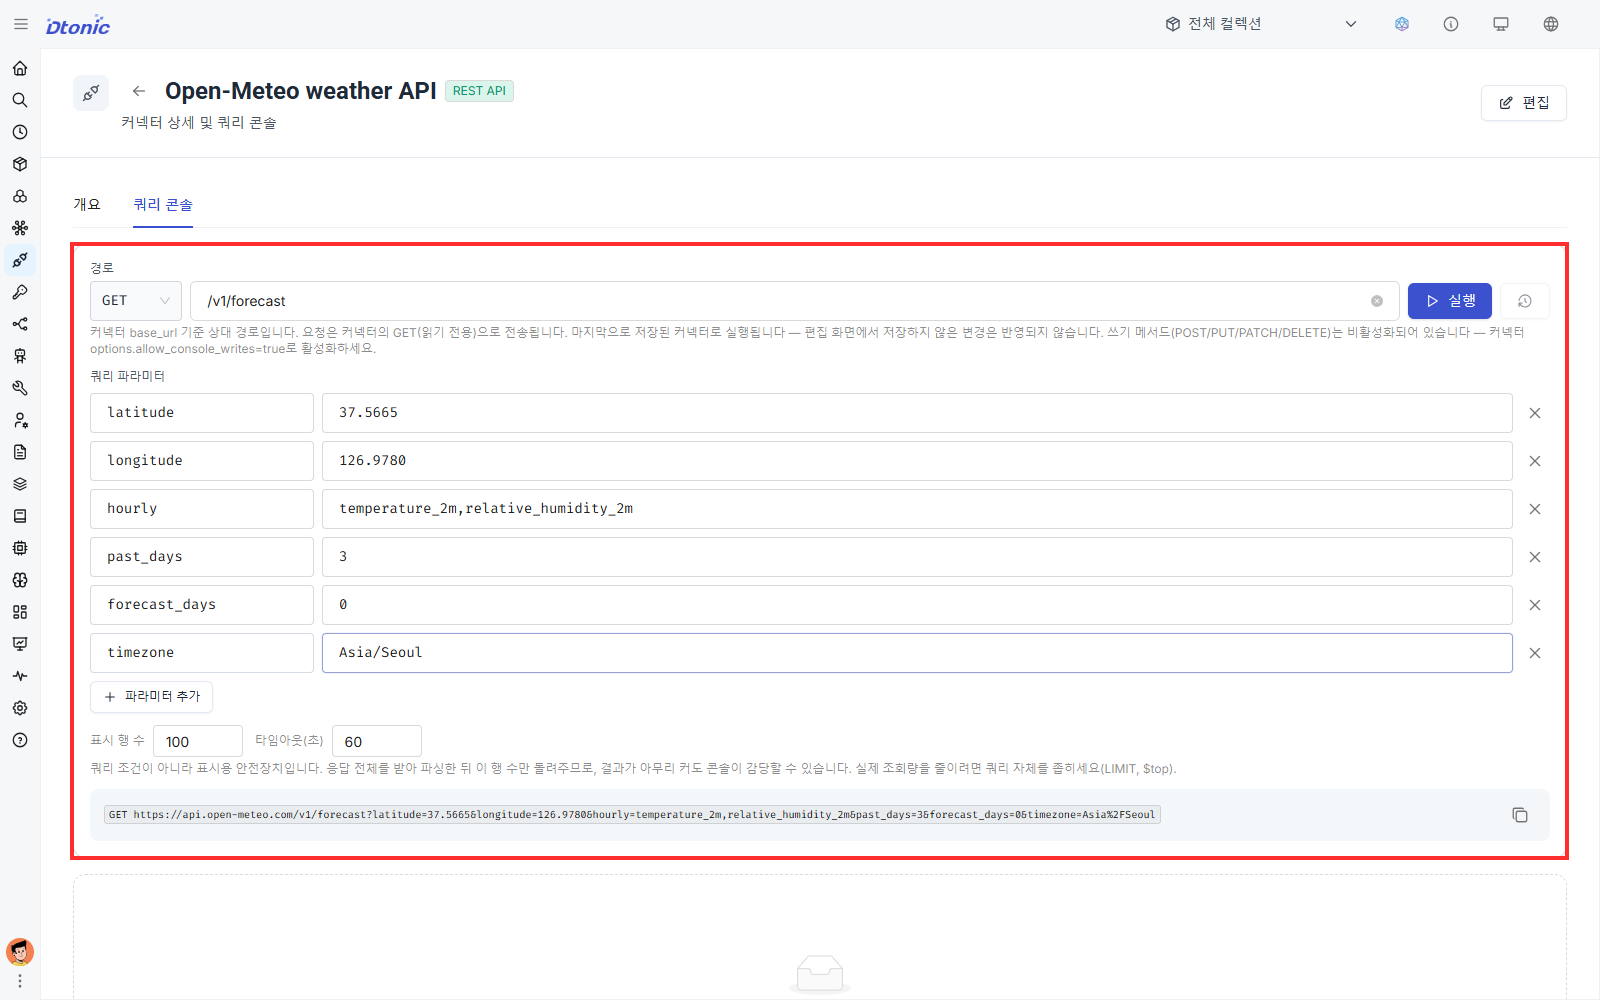
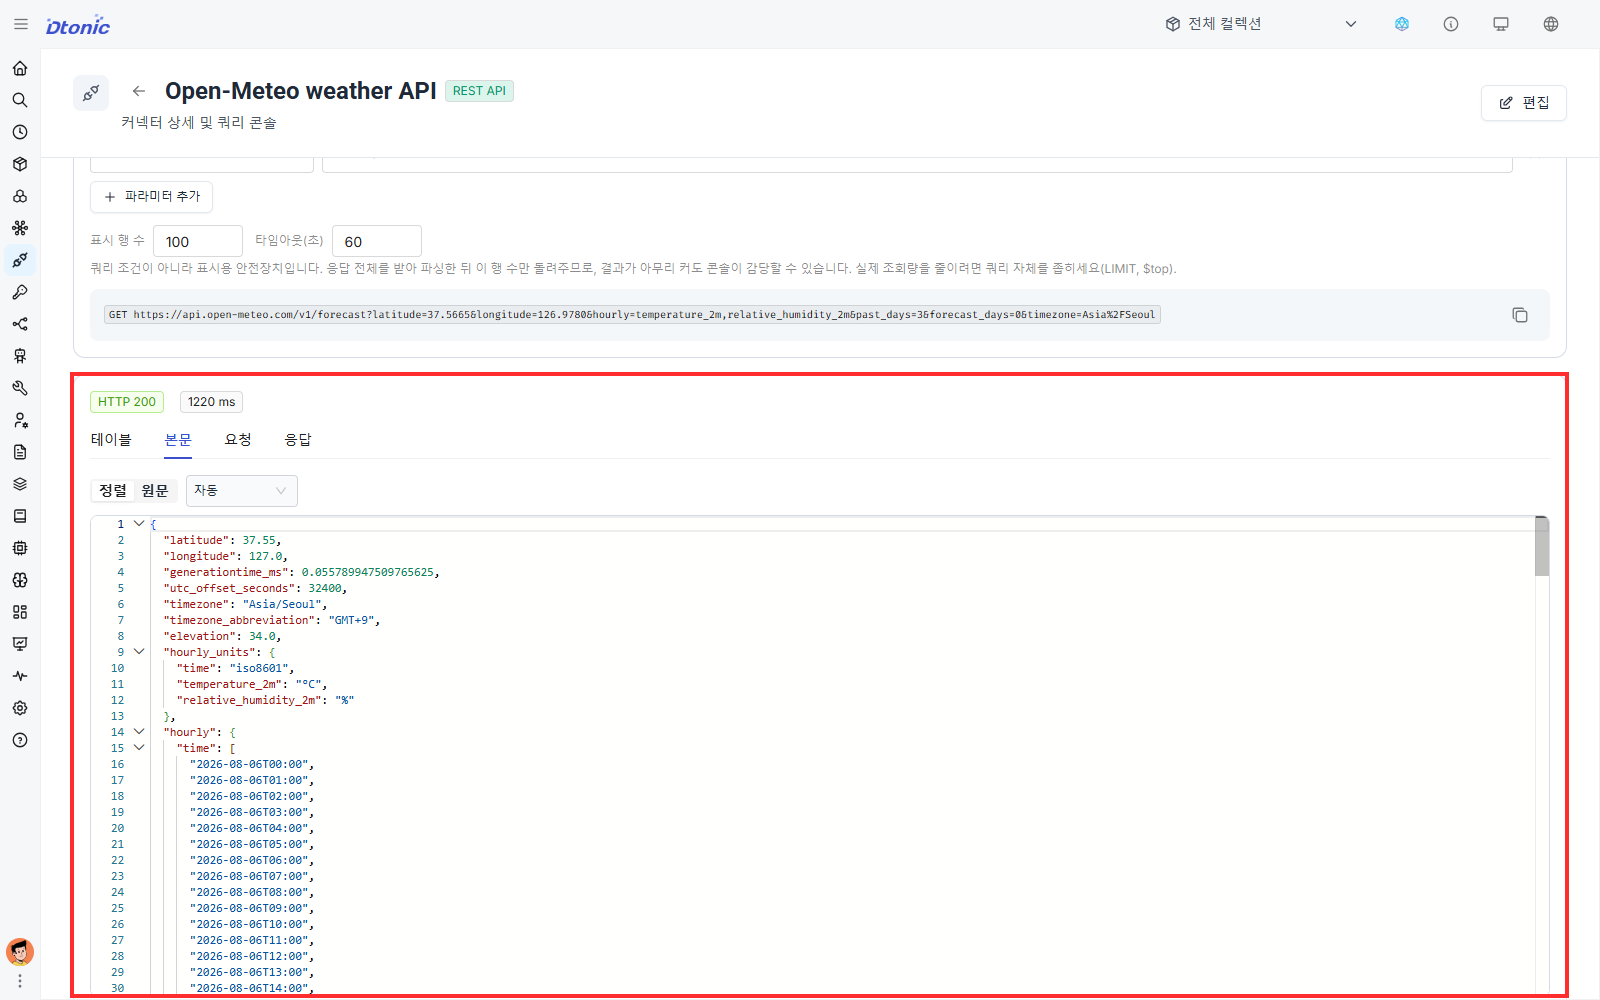
- Select Run, confirm HTTP 200, then open the Body tab.
The response looks like this:
{
  "latitude": 37.55,
  "longitude": 127.0,
  "timezone": "Asia/Seoul",
  "hourly_units": { "temperature_2m": "°C", "relative_humidity_2m": "%" },
  "hourly": {
    "time": ["2026-08-03T00:00", "2026-08-03T01:00", "..."],
    "temperature_2m": [27.6, 27.1, "..."],
    "relative_humidity_2m": [87, 89, "..."]
  }
}
The three arrays under hourly have the same length and the same order: the reading at time[0] is temperature_2m[0] and relative_humidity_2m[0]. With past_days=3 and forecast_days=0 they hold the last three full days — 24 × 3 = 72 entries.
Check yourself
- Can you explain the difference between Supported Tech · Managed and Custom?
- Is the name
open_meteo, and is the Base URL host-only? - Did you finish with create after a successful Test Connection?
- Does
hourly.timehold 72 values in the Query Console? - Do you see that registering a connector alone produces no dataset?
Next lesson
You bind this connector to a code node and build the first pipeline, loading the response you just read into a 72-row dataset.
Before you finish
Use these questions to check whether you achieved this lesson's goal.
- Can you repeat ‘Register a public REST API as a data connection’ without following the instructions?
- Can you name at least one place to check when the result differs from what you expected?