Load an API response into a dataset with a code node
What you will learn
Build the first pipeline and bind the REST connector to a code node to ingest 72 hourly readings into a dataset.
A pipeline is a workflow you assemble on a canvas from a collection's datasets, code assets, and transform nodes.
This lesson builds the first one. It has no input dataset: the thing producing data is an external API, so a code node with a connector bound to it is the pipeline's starting point.
Why this needs code
The response you inspected in lesson 02 was a nested object of column-wise arrays.
hourly.time[]                  ["2026-08-03T00:00", "2026-08-03T01:00", ...]
hourly.temperature_2m[]        [27.6, 27.1, ...]
hourly.relative_humidity_2m[]  [87, 89, ...]
A dataset is a set of rows, so those three arrays have to be zipped by index into one row each. No standard transform — rename, cast, aggregate — expresses that. Hence a code node.
Create the result dataset first
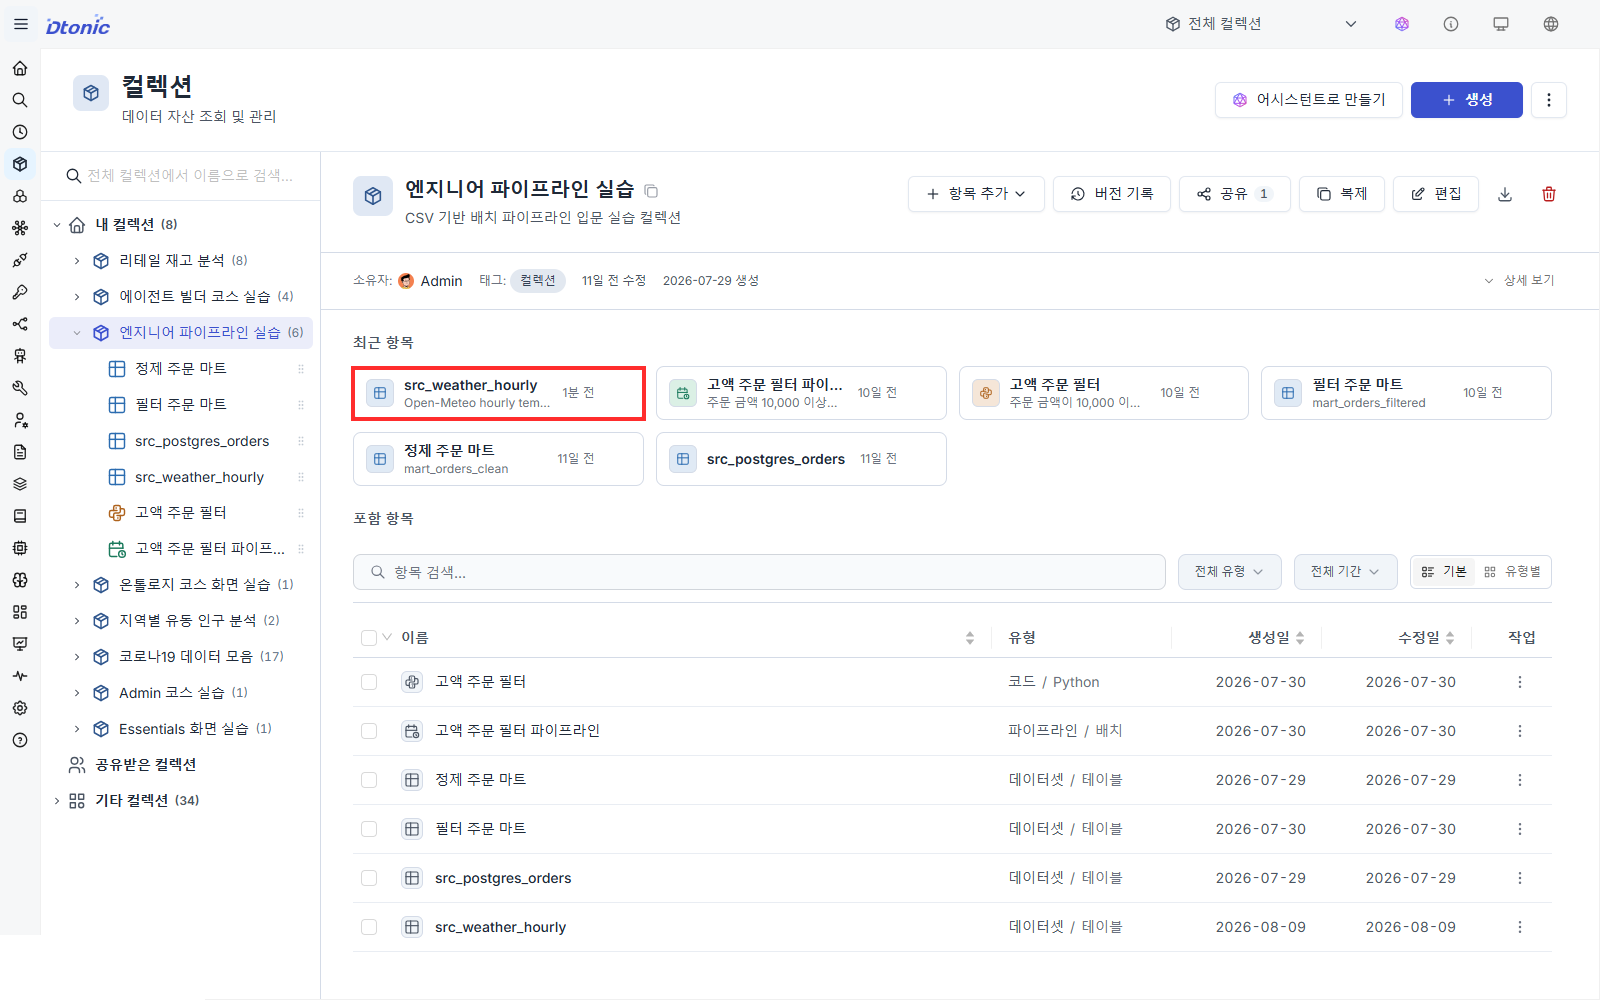
Before opening the pipeline editor, create the src_weather_hourly table in your collection. Output tables created through Quick Add can fail to resolve when the pipeline is saved.
- Select Collections in the left sidebar and open the training collection.
- Select Add item, hover over Dataset, and choose Table.
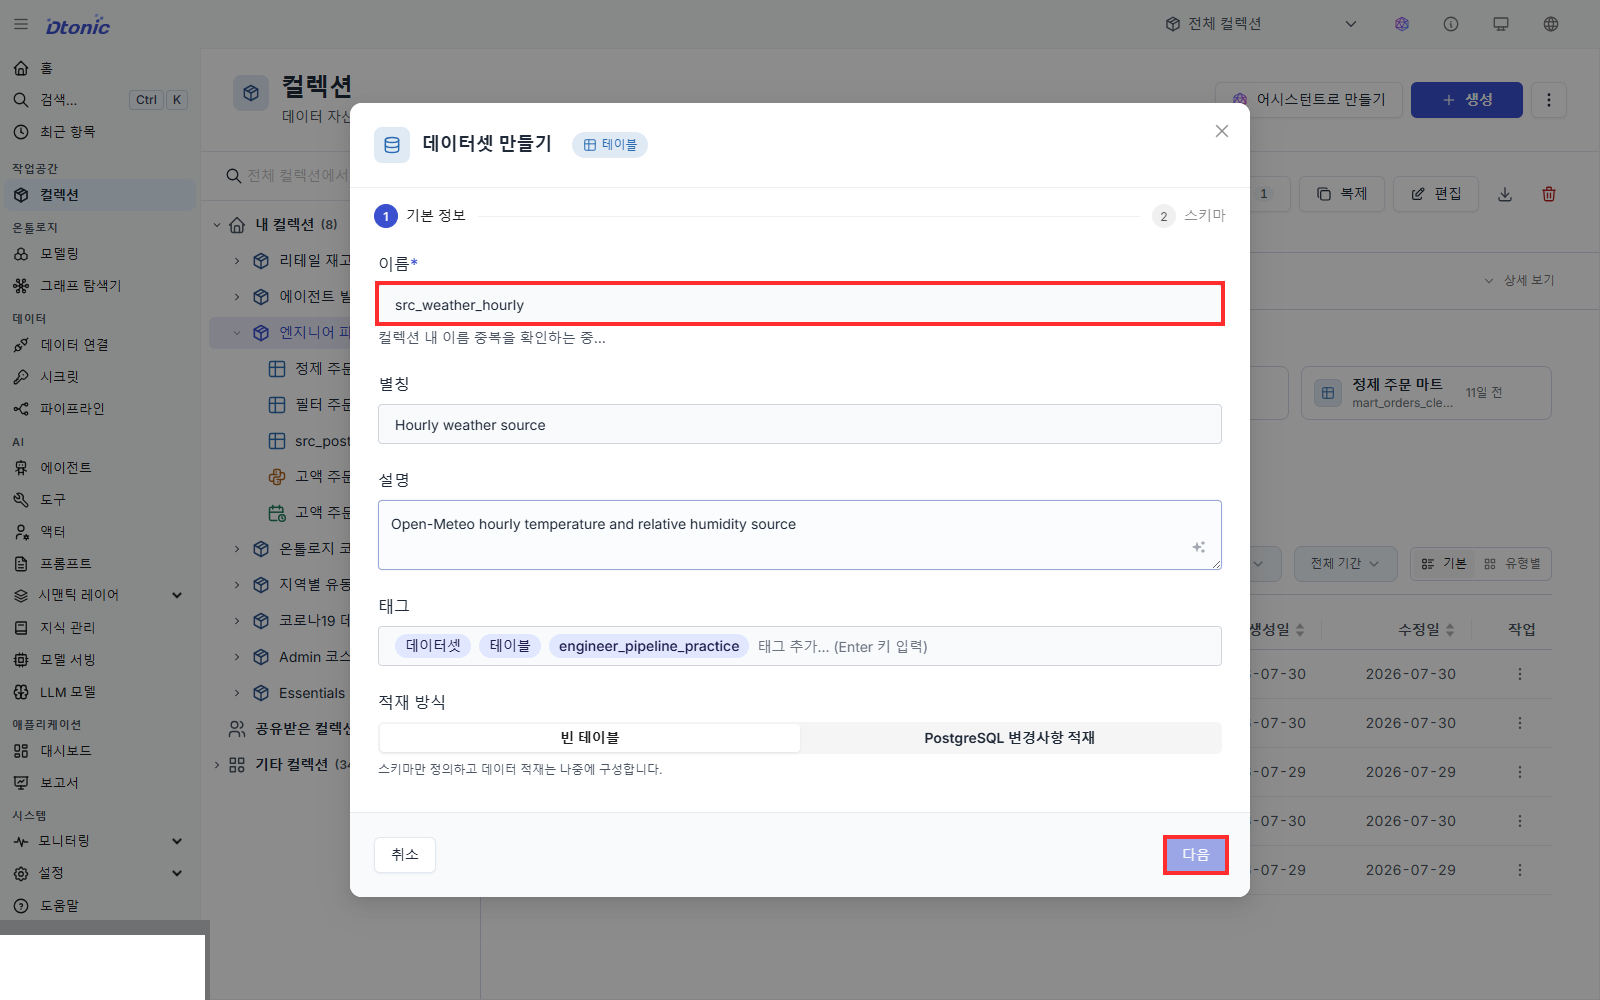
- Under Basic information, name it
src_weather_hourly. Leave Alias blank or entersrc_weather_hourlyso the collection list shows the same identifier, then select Next.
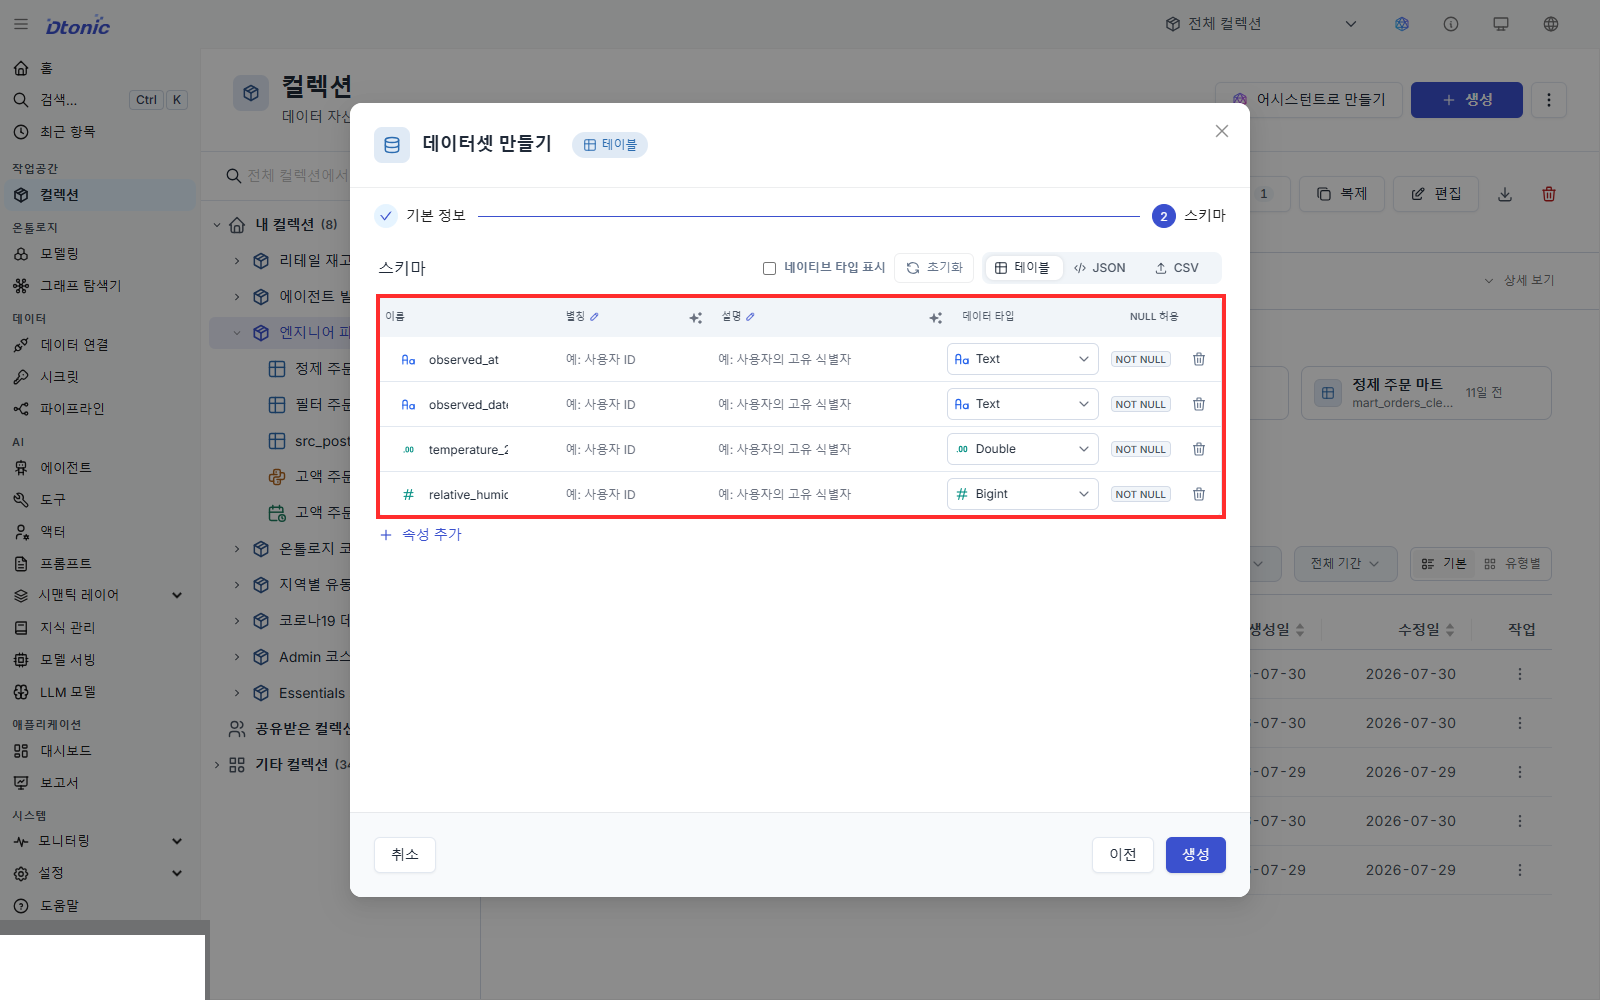
- Define four columns in Schema:
| Column | Data type | Meaning |
|---|---|---|
observed_at | Text | Observation timestamp, e.g. 2026-08-03T00:00 |
observed_date | Text | The date portion only. Lesson 04's grouping key |
temperature_2m | Double | Temperature in °C |
relative_humidity_2m | Bigint | Relative humidity in % |
- Replace the default
field1and add the other three columns. Once the fields are real, the bottom action changes to Create; select it.
Leaving two column names exactly as the API returned them is deliberate. The raw layer preserves the API's vocabulary; readable names are the next lesson's job.
Create the Python code asset
Create the code as a collection asset before opening the pipeline. A temporary code node made through Quick Add may not resolve to a valid code ID when the pipeline is saved, so this course does not use that route.
- In the training collection, select Add item → Code → Python.
- Set both name and alias to
collect_weather_hourly. - Enter
Collect hourly weather from Open-Meteoas the description. - Select Next. The code below uses the runtime's built-in
polars, so no additional package declaration is needed.
Bind the connector
Using a connector from code requires a @use_connector declaration. Let the editor insert it rather than typing it.
- Type
@on the first line of the code editor. - Choose connector from the menu that appears.
- Choose
open_meteofrom the connector list.
This line is inserted:
@use_connector("open_meteo", ref="open_meteo")
The first argument is the variable name your code uses; ref is the connector name to look up. At run time the runtime resolves that name, builds the connection object, and injects it into the variable. The address and credentials stored on the connector never appear in your code.
Write the code
Below the decorator, write the following code and select Create:
@use_connector("open_meteo", ref="open_meteo")
def run(options=None, contexts=None):
    import polars as pl

    body = open_meteo.get(  # noqa: F821 — injected by @use_connector
        "/v1/forecast",
        {
            "latitude": 37.5665,
            "longitude": 126.9780,
            "hourly": "temperature_2m,relative_humidity_2m",
            "past_days": 3,
            "forecast_days": 0,
            "timezone": "Asia/Seoul",
        },
    )

    hourly = body["hourly"]
    frame = pl.DataFrame(
        {
            "observed_at": hourly["time"],
            "observed_date": [value[:10] for value in hourly["time"]],
            "temperature_2m": hourly["temperature_2m"],
            "relative_humidity_2m": hourly["relative_humidity_2m"],
        },
        schema_overrides={
            "observed_at": pl.String,
            "observed_date": pl.String,
            "temperature_2m": pl.Float64,
            "relative_humidity_2m": pl.Int64,
        },
    )
    return {"src_weather_hourly": frame}
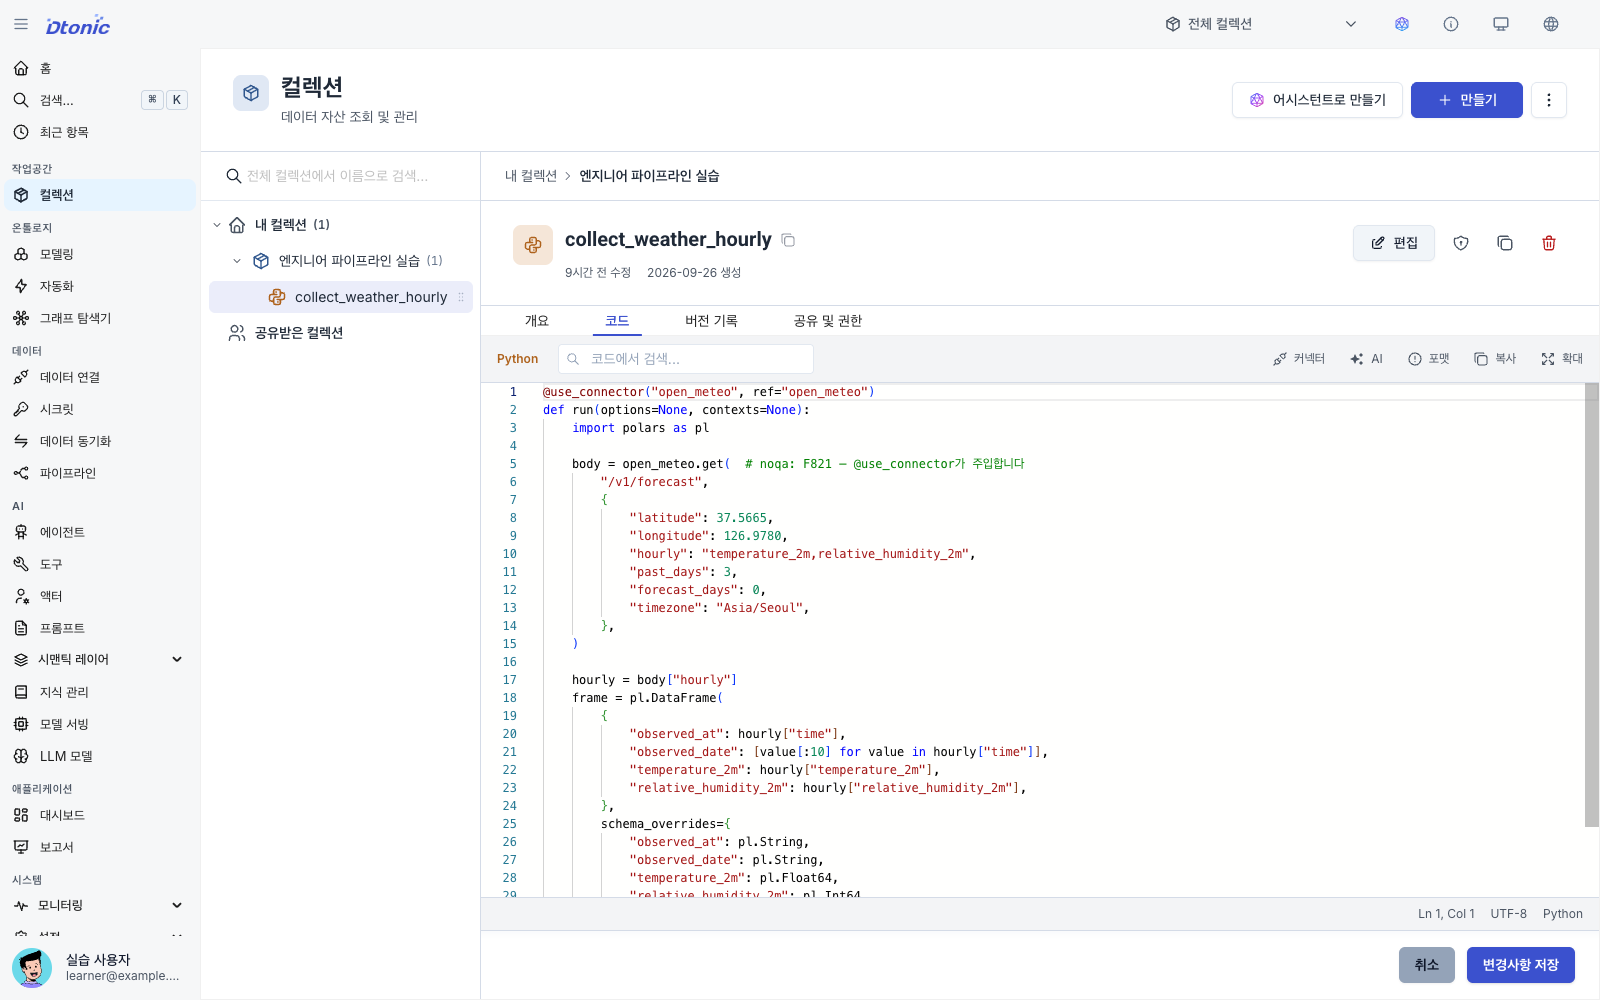
After creation, open collect_weather_hourly from the collection and confirm that the source appears in the Code tab. If only the asset name exists and the editor is empty, choose Edit → Code, paste it again, and select Save changes. A code asset without a source file fails during pipeline save or startup.
Three things to notice:
runtakes no input argument. A code node with no input dataset connected is called without one. The connector is the only source of data.getreturns parsed JSON. You get a dictionary, not a response object, sobody["hourly"]works directly. The path is appended to the connector's Base URL.- The returned dictionary's key is the output port name.
src_weather_hourlymust match the output dataset you connect in a moment.
observed_date comes from slicing the first ten characters of the timestamp. Lesson 04's aggregation groups on that column.
The returned frame is a Polars DataFrame. schema_overrides sets the four dataset column types, keeping them stable for an empty response or null readings. The next lesson's code nodes also receive table inputs as Polars DataFrames.
Open the editor and pick a collection
- Select Data → Pipelines in the left sidebar.
- Select Create in the upper-right.
- Choose the training collection on Select pipeline collection. The editor opens as soon as you choose it; the current UI does not require a separate Continue click.
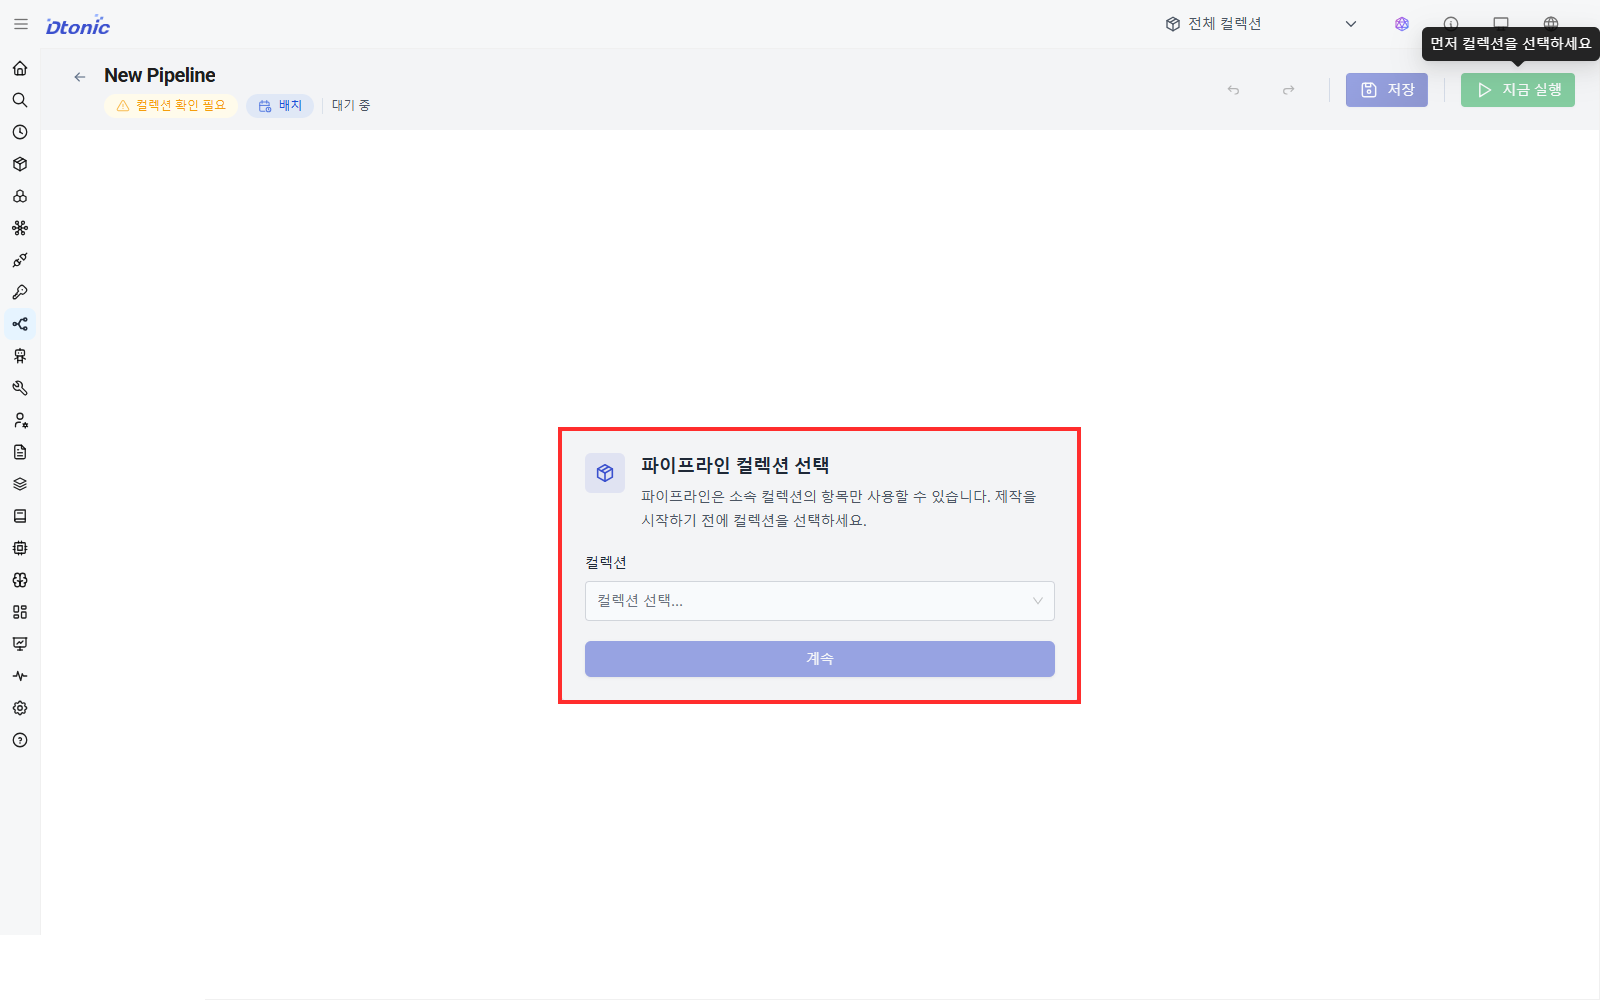
You cannot add items or run anything before choosing a collection, and a pipeline can only use assets from the collection you chose.
Connect the output dataset
- Search for
collect_weather_hourlyin the Component Library. Drag the vertical-dot handle on the item's right edge onto an empty part of the canvas. - Search for
src_weather_hourlyand drag it with the same right-edge handle. Dragging the name itself may only select the item. - Connect the code node's right handle to the dataset's left handle.
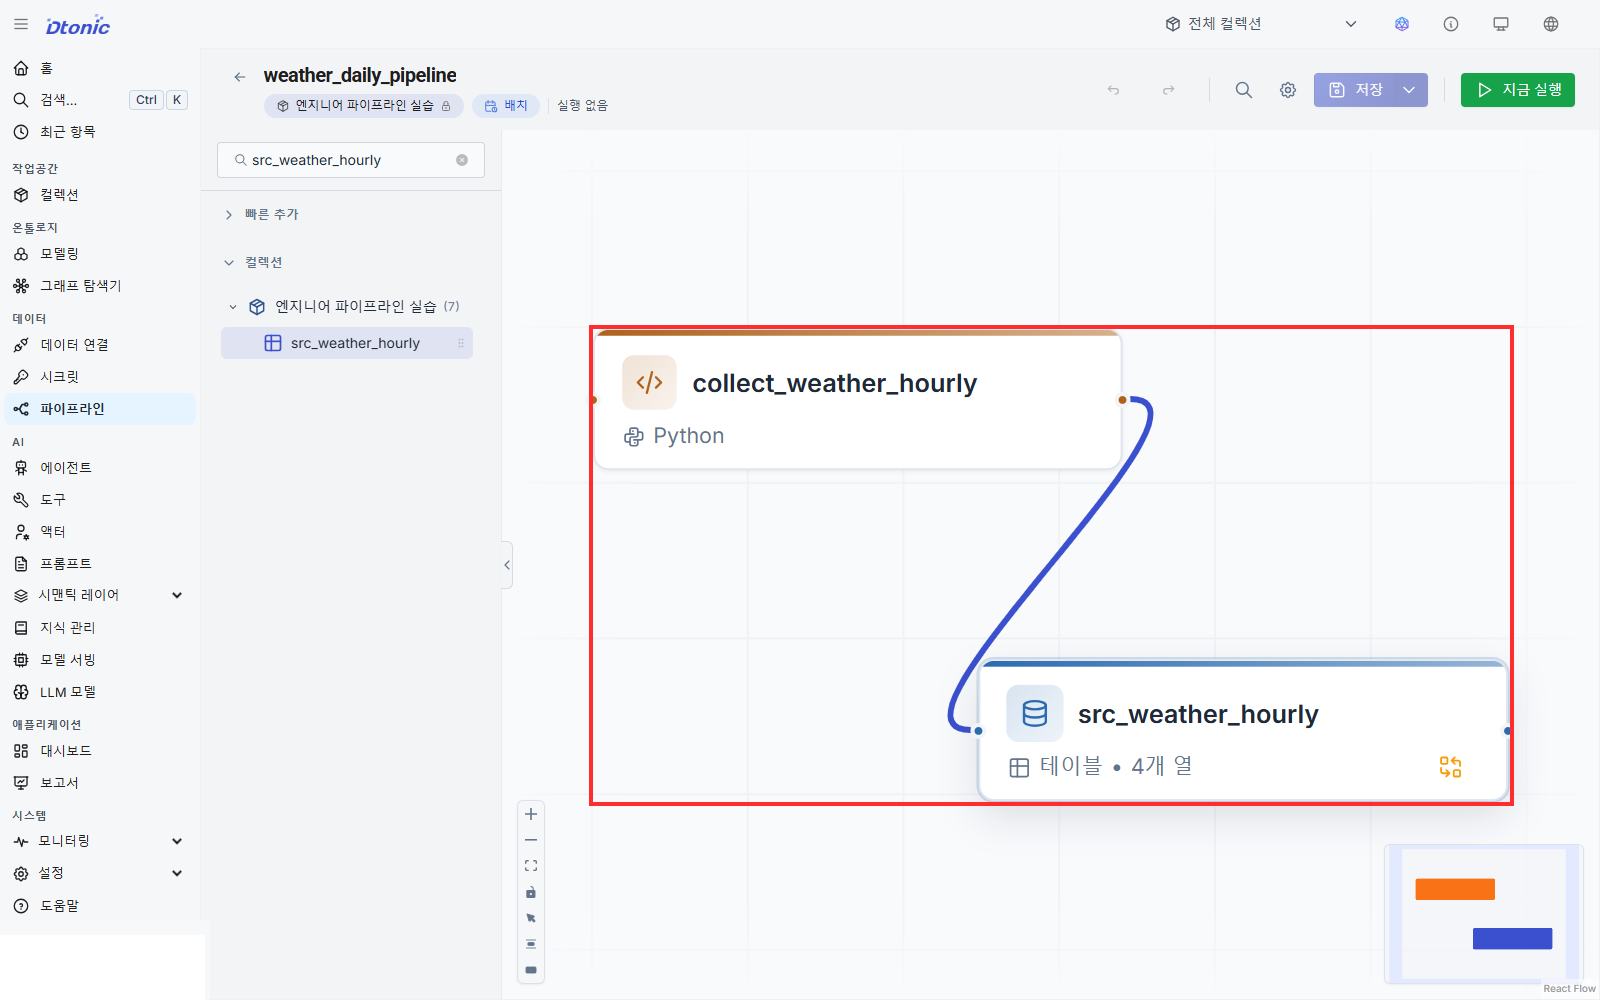
- Select the code node and open the inspector's Options tab.
- Expand the
src_weather_hourlyrow under Output (1). - Confirm the return key and dataset, change Write mode to Overwrite, and select Save at the bottom of the inspector.
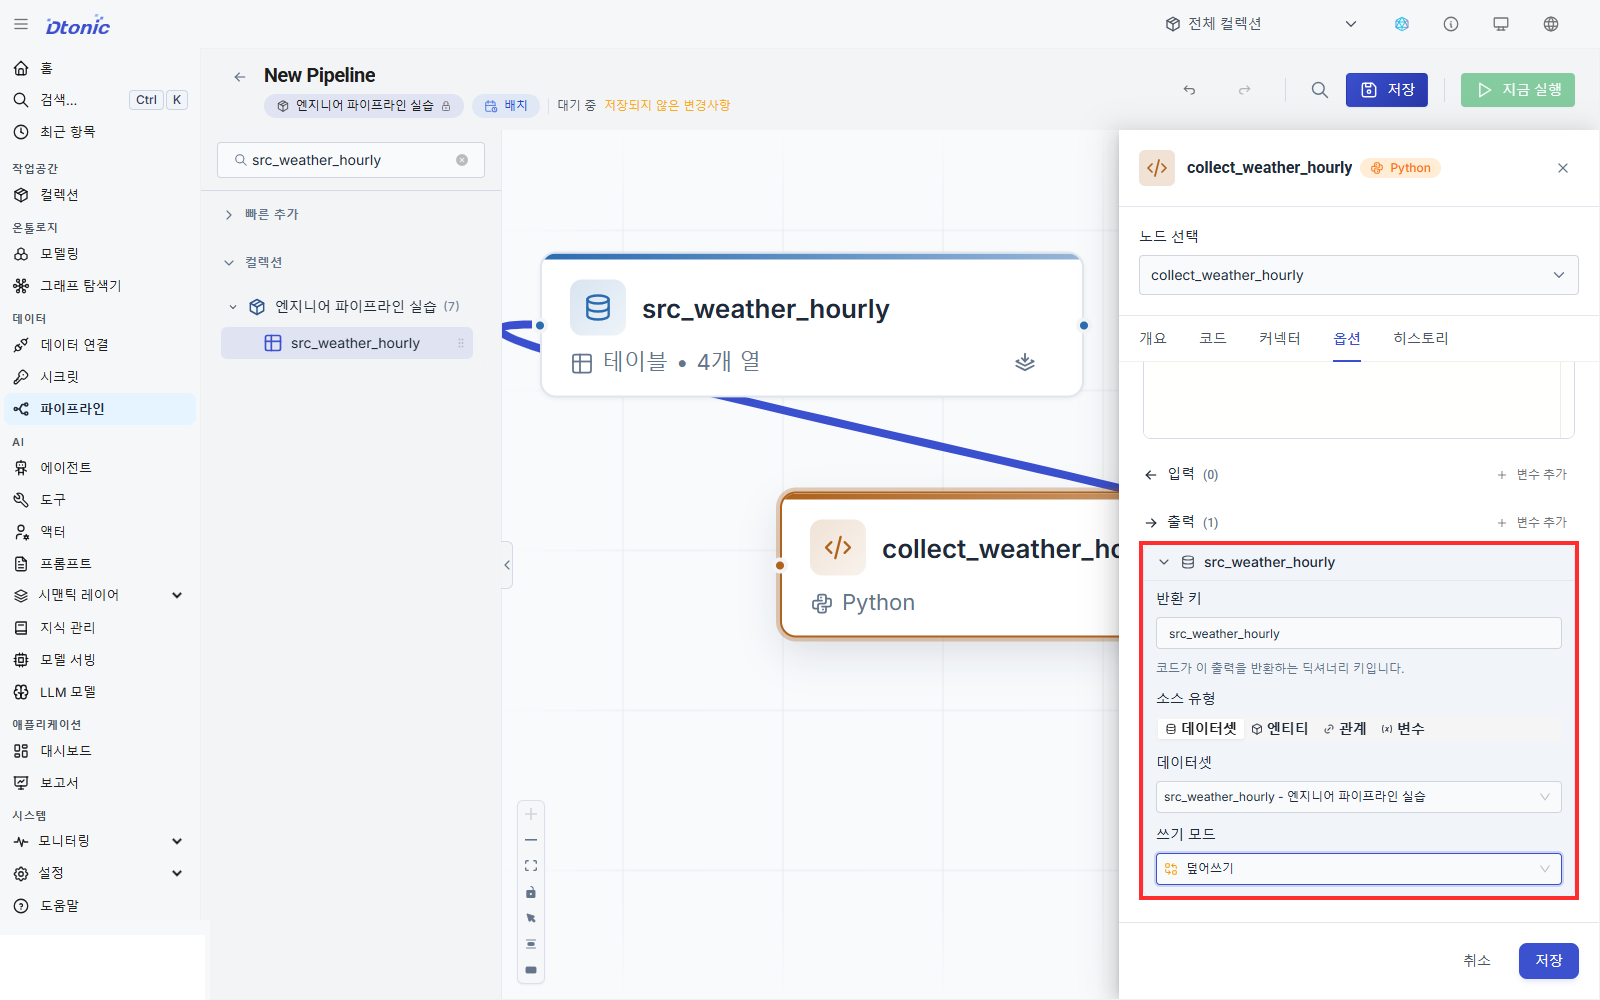
collect_weather_hourly → src_weather_hourly
If the output port name differs from the returned dictionary's key, the run fails. Compare the name in Output against the return {"...": frame} key side by side.
Save and run once
- Select Save in the upper-right.
- Name it
weather_daily_pipelineand leave the type as Batch. - Once saved, select Run now.
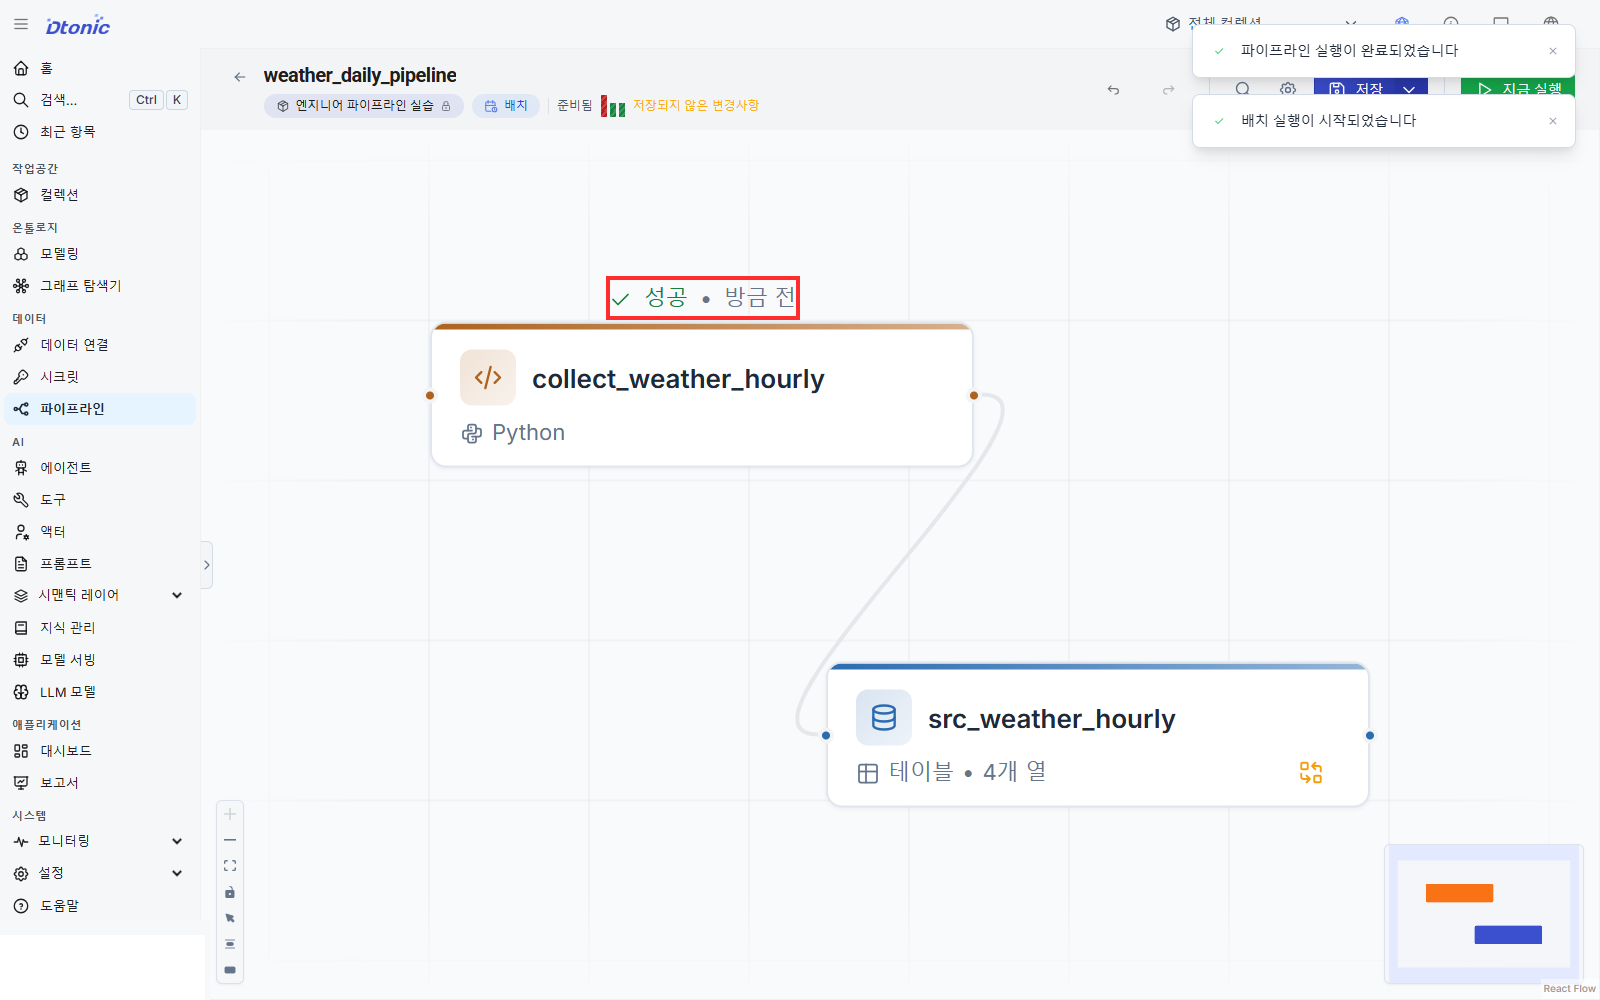
You grow this same pipeline through the remaining lessons rather than creating a new one each time.
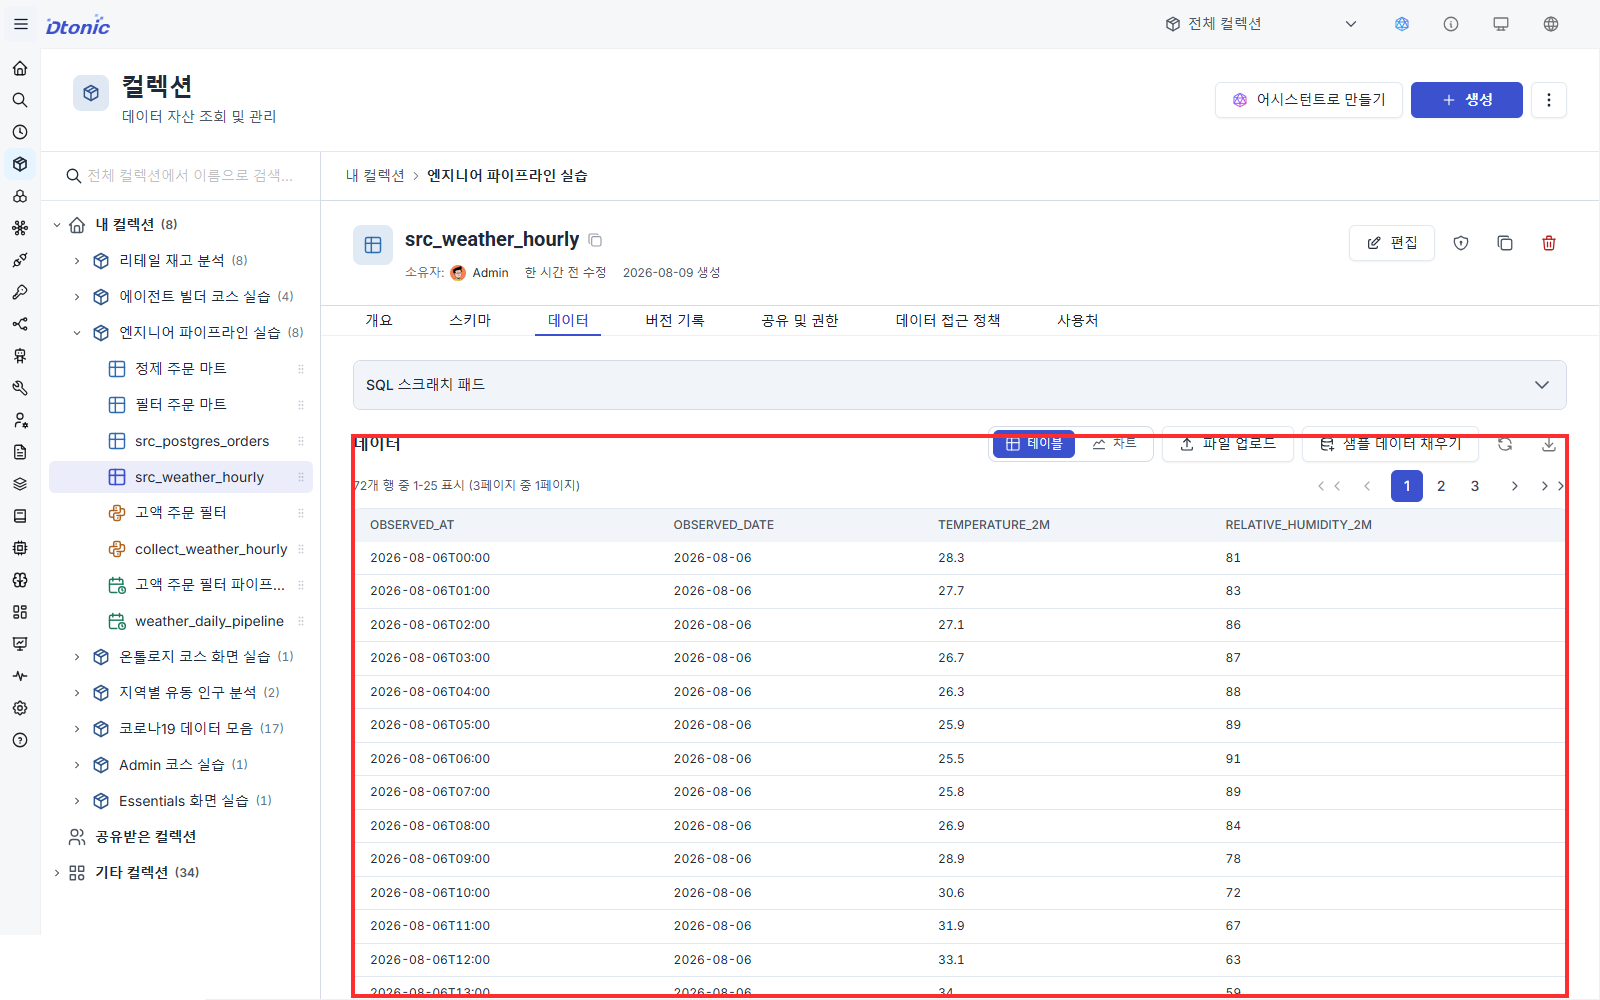
After the run, open src_weather_hourly in the collection and check the Data tab:
- Are there 72 rows? That's 24 hours × 3 days.
- Does
observed_datehold three distinct dates? - Does
temperature_2mcarry decimals andrelative_humidity_2mwhole numbers?
Check yourself
- Did you create
src_weather_hourlywith its four columns before building the pipeline? - Does the code node declare
@use_connector("open_meteo", ref="open_meteo")? - Are the returned dictionary key and the output port name both
src_weather_hourly? - Is the write mode Overwrite?
- Did the run load 72 rows?
Next lesson
You attach a preparation code node to the same pipeline: rename the API's columns into readable ones, then aggregate 72 hourly rows into three daily rows for an analysis-ready mart.
Before you finish
Use these questions to check whether you achieved this lesson's goal.
- Can you repeat ‘Load an API response into a dataset with a code node’ without following the instructions?
- Can you name at least one place to check when the result differs from what you expected?