Change and recover an FGAC policy safely
What you will learn
Record the current policy, validate a change with a test subject, and restore it manually if a problem occurs.
An FGAC policy change affects the subject's visible data as soon as you save it. The current portal has no impact preview that calculates affected users, resources, or rows. It also has no policy history or one-click revert.
Operate policy changes by recording the current state, testing on a small subject, updating the real subject, and restoring the old values manually when needed.
The safe rollout sequence keeps a recorded recovery point on both sides of the production change.
Loading the diagram. Mermaid source:
flowchart LR
    accTitle: Safe policy change and verification flow
    accDescr: Record existing values, apply the proposal to a test subject, inspect real query results, update the production policy, and verify again.
    record[Record existing values] --> test[Apply to test subject]
    test --> inspect[Inspect real query]
    inspect --> rollout[Update production policy]
    rollout --> recheck[Verify production result]
Step 1: Record the current state and intent
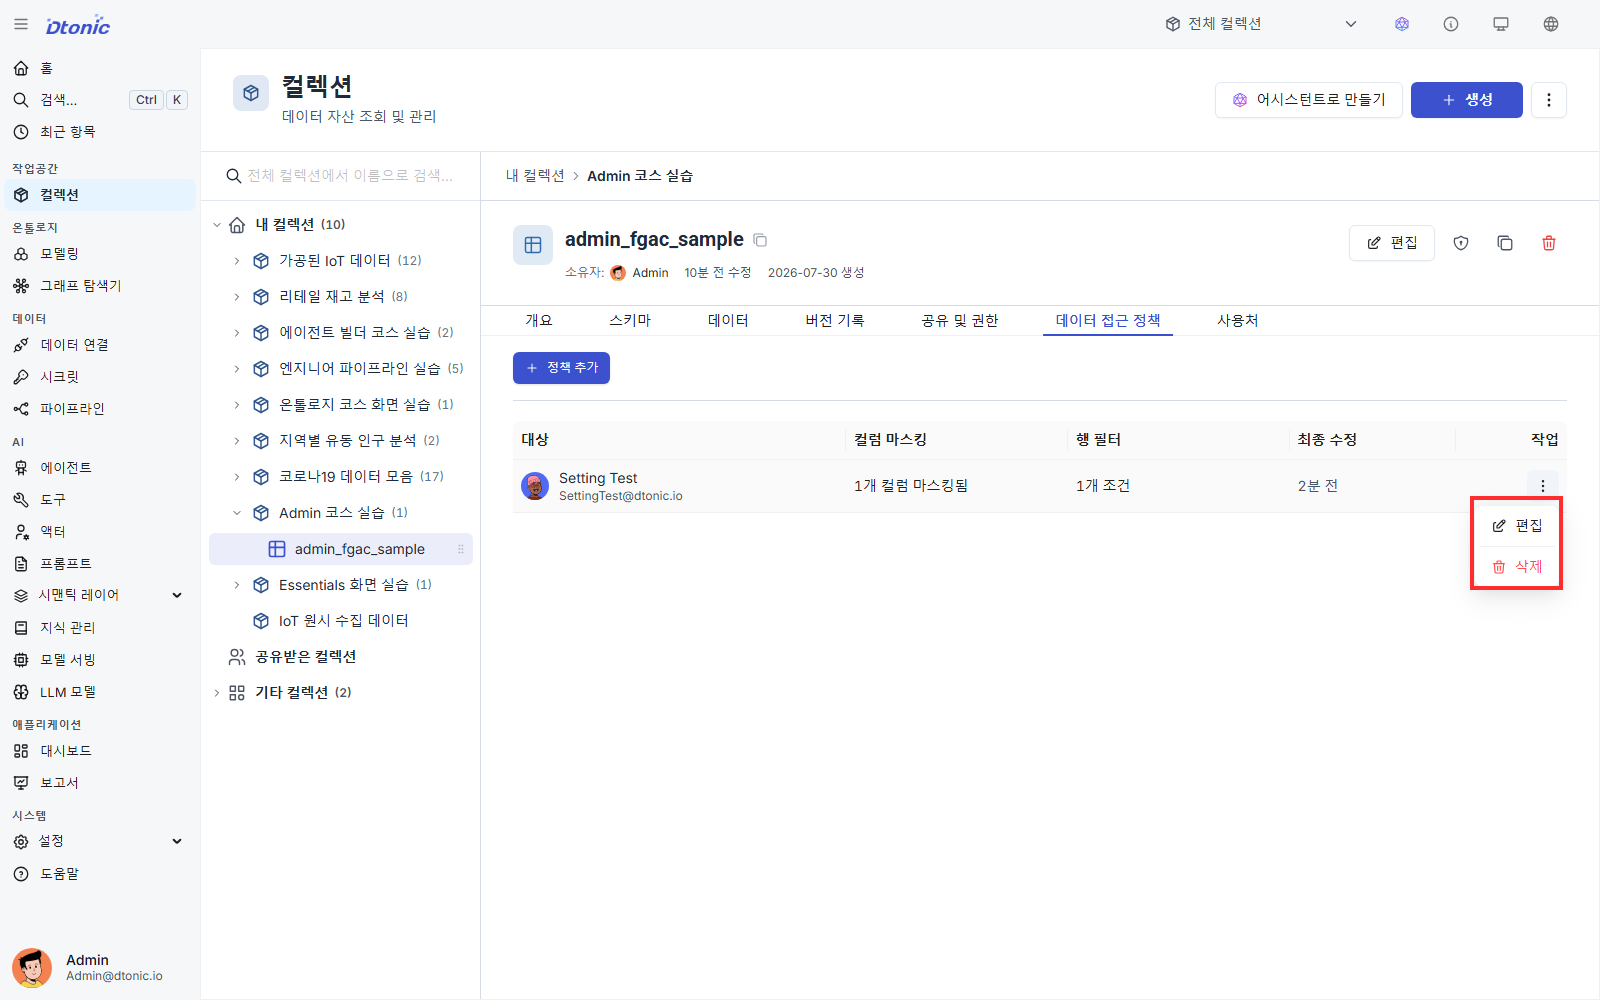
Open the dataset's Data Access Policies tab and select Edit from the target policy's row menu. Before saving anything, record the following in a change request or operations note:
- Dataset and subject user or group
- Current column masks and row-filter conditions
- Intended change and reason
- Verification query and expected result
- Previous values to restore if the change fails
Because the portal cannot open an earlier policy version, you must record the current editor values yourself. Do not capture sensitive data values in screenshots or tickets.
Step 2: Validate with a test user or group
Do not immediately change a policy for a large group. Prepare a test user or a small test group that can access the same collection.
- Grant the test subject the required collection and dataset role.
- Select Add Policy and choose the test subject.
- Configure the proposed column masks and row filters with the same values.
- Sign in as the test subject and confirm that allowed data is visible and restricted data is not.
- If the user belongs to several groups, verify the final result after their other group policies are combined.
Each policy belongs to one dataset-and-subject pair. A single policy cannot be attached to several datasets, so validate each dataset separately.
Step 3: Change the real policy
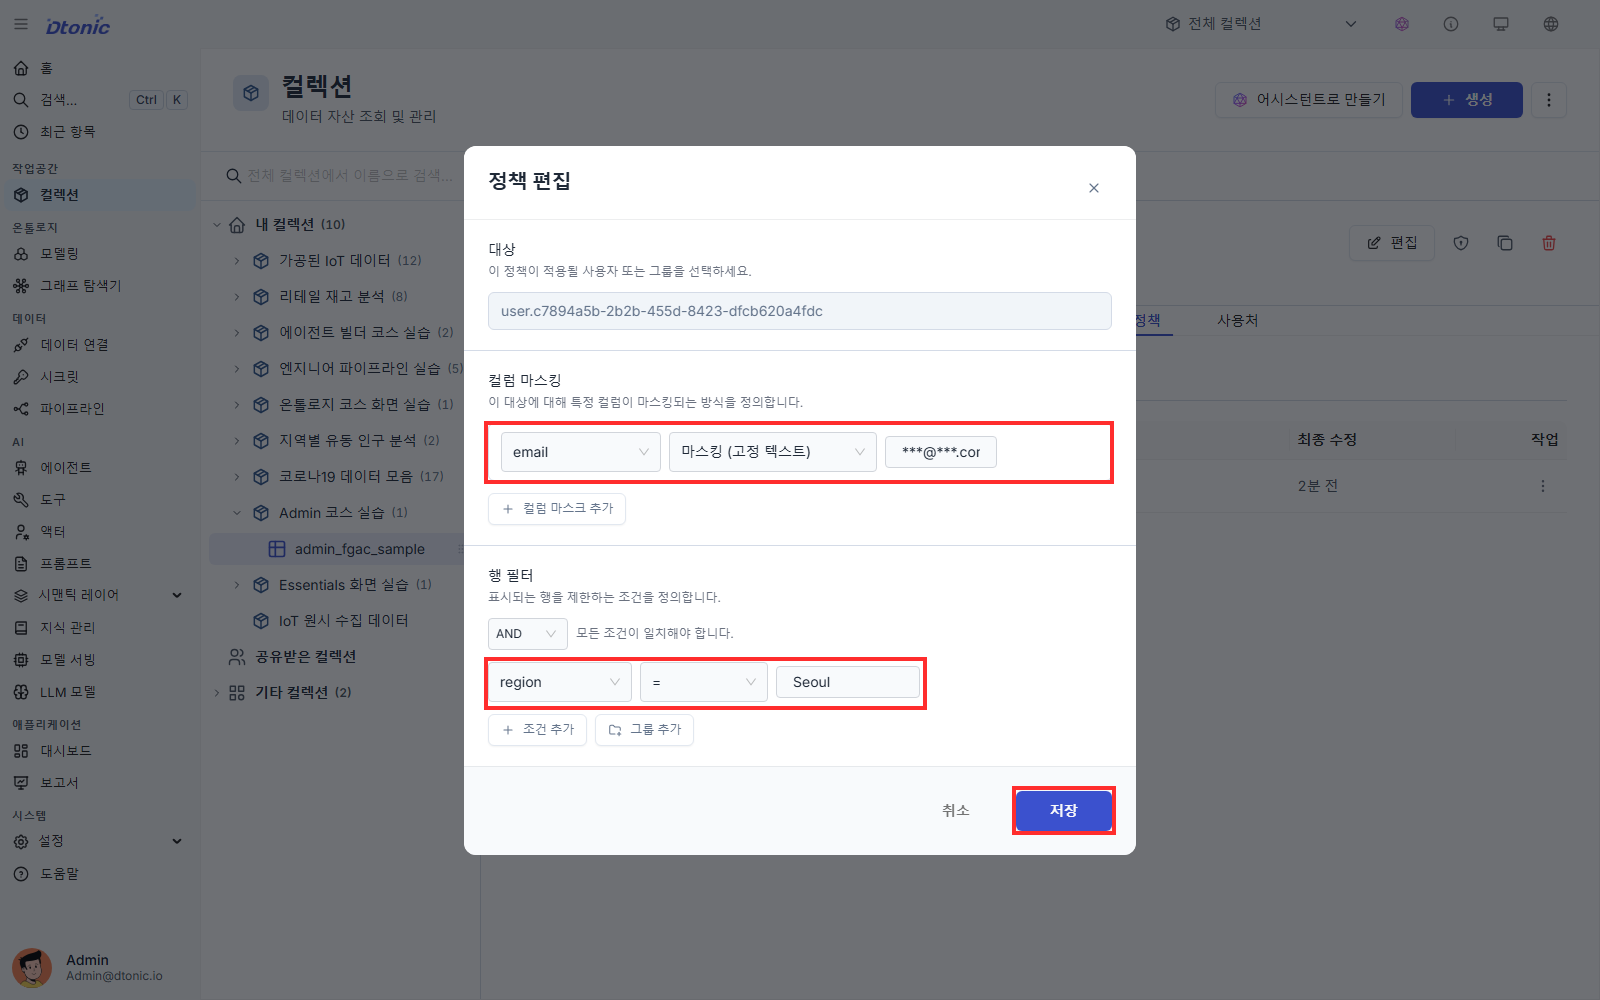
- Select Edit from the real subject policy's row menu.
- Apply the masks and filters you tested.
- Select Save.
- Confirm that the Updated time changes in the list.
- Repeat the query as a real non-administrator member of the target subject.
The Updated value only shows when the policy last changed. It does not identify the actor or display a before-and-after diff.
Recover manually if the change fails
There is no automatic rollback. If verification fails, choose one of these actions:
- Edit the policy and restore the previous masks and filters from your record.
- Select Delete from the row menu if the policy itself is invalid.
Deleting a policy keeps the subject's dataset role but removes the column and row restrictions supplied by that policy. This can expose more sensitive data, so temporarily revoke dataset access first when appropriate.
After recovery, verify again with the non-administrator subject account and record the change time and result in your operations note.
Operations checklist
- Recorded the existing policy and the reason for the change.
- Verified the proposed result with a test user or group first.
- Used an account that is not an administrator or dataset Owner for verification.
- Queried again after changing the real subject's policy.
- Kept enough information to restore the previous values manually.
Next lesson
Use Recents to find recently modified assets and distinguish it from an audit log or version history.
Before you finish
Use these questions to check whether you achieved this lesson's goal.
- Can you repeat ‘Change and recover an FGAC policy safely’ without following the instructions?
- Can you name at least one place to check when the result differs from what you expected?